


1. Cornelius and the Buccaneers
Although it may sound like a cheesy band, Cornelius and buccaneers can be very helpful with Go Bananas and Reckless Frenzy. If you're using Cornelius, try to get a valor's fortress on him to prevent him from dying and getting in extra hits. The same thing holds true to buccaneers, although leviathan's call and kraken's lament could be used to if you're the buccaneer that's using it. If you're in the tower with a privateer, make sure they use accuracy/dodge buffs, and accuracy doubloons are always a help.


2. Captain Blood's Jacket
Captain Blood's Jacket is the most important item for the tower. No questions asked. If at least one person in your group has it, it can be the difference between a two and a half hour run, and a two hour run. These overpowered flames can help you charge through the floors with ease, especially if everyone on your team makes a barricade across the floor with them. If you place them right, you can kill all of the nefarious five in 2-3 turns. Note: if your flames do not pull up in your hand, Musketeers, you can easily replace it with bombs and traps, and Privateers, big guns. You can right click on the tile that you're placing them on to make sure the rest of your team knows where you're placing the flames. This way, you can strategically place your flames on every floor and laugh as your enemies walk into them.

3. Multi-Enemy Attacks
Multi-enemy (AoE) attacks are a huge help for this nefarious tower. You're attacked by waves and waves of units, and single-enemy attacks just aren't as much as a help. If you do about 800-1000 damage with a single-enemy, you can do about 500-1000 damage on an average of about four enemies. (maybe even 1500 damage if you play your doubloons and buffs right. I'll explain later.) The recommended multi-hit moves for each class could be seen below:
- Witchdoctor - Mojo Storm, Jobu's Embrace, and Mojo Strike.
- Musketeer - Bombs, Scatter Trap, Inferno Shot, and Hurricane Round.
- Privateer - Big Guns, and possibly Artillery.
- Buccaneer - Reckless Frenzy.
- Swashbuckler - All Poison abilities, Gambit of Steel, and Dance of Steel.
Note: Since the buccaneer and swashbuckler AoE attacks are for close range, if you're using the Blood Flame method, I wouldn't recommend them unless the enemies get past your traps.
 |
4. Zeena and Louis: Two Very Helpful Companions
Zeena and Louis Le Bisque are extremely useful companions. Zeena's fires are used by most to block the passageway to your characters and companions so you can stall and damage as your enemies try to get closer. The same thing holds true with Louis Le Bisque's bombs. An alternative to Louis would be his crowns shop equivalent: Pepe DeTorteau.

5. Companions for the Second Floor
For the second floor, I highly recommend ranged companions. Not only are you going to have Captain Blood's fires to block your path to the other side, you'll have spikes in the middle that'll damage you if you cut across. These spikes normally do around 200 damage. That's a major amount of damage considering you'll have a 50% chance of hitting two of them if you decide to go across. I recommend one of these companions to be Zeena, Louis, or Pepe. It'll help make a bridge of traps between you and the enemies like they have the spikes to their advantage.

6. Strategy for the Third Floor
For the third floor, you want to unequip your pets. If you keep them on, you'll be really lucky to not get an extra few enemies (pretty tedious to beat, too, considering they're hidden half the time.) There are five statues. If one breaks, it will send out a Corrupted Foo Dog. Pets don't know this, so they'll most likely misbehave and break one (Sadly, we can't punish pets in this game for that.) Also, you'll want to avoid using minions or minion doubloons, and make your Blood Flames at least two squares away from a statue, as it'll burn the statue and spawn a Foo Dog if it's right next to one. Obviously, you want you or your companions to avoid breaking statues, as it would be very err... not smart of you to break one to put it nicely.
Note: Sometimes, if the witchdoctor pig enemies have nothing to do, they'll break the statues with a mojo storm. This is not under your control.

7. Strategy for a Nefarious 6th
Sorry, this tip isn't for the computer being able to control your character to kill your teammates. I know you wanted them to know that. Instead, this is how to make the fight as easy as possibly for your teammates to kill the other nefarious 6 members. Unequip all of your gear, or you can put on no-stat gear, such as a four-leaf clover eyepatch or any cosmetic (style - no stats) piece of gear. If you do choose cosmetic gear, still make sure to take off your weapon, totem, charm, and ring. Make sure you're the first person in the fight. On the first turn, go ahead and drink the Manchurian Elixir (evil potion) and turn into the "Nefarious" 6th. If you're not first or wait until the second turn, then you risk one of the Nefarious 5 being killed and with that, your chance of getting the Nefarious 6th badge is killed. People will fear you and bow down to you in your no-stat clothes. If your teammates spam Blood Flames, the five other Nefarious members should be dead in a couple turns, and while you slack off, your teammates have earned you a shiny new badge!

8. Stay Away From Faye
Insensitive Faye Jennings, better known as the obnoxious privateer of the nefarious five, is tricky to beat if she survives your Blood Flames, they don't pull up in your hand, or you simply aren't using the Blood Flames method. If you are by Faye, if you attack, you'll be charmed and used against your own teammates. The same goes for your companions. Instead of attacking Faye if she gets near, run away! You can also attack her if you're hidden before you go up to her and attack. If not, then only attack from long range - at least four squares away.
If you do have blood flames, attack all of the Nefarious 5 at once. Using frozen tide from Moo Manchu's boots will also help when using this method. Multiple flames can burn one enemy (or vice-versa) and they'll be frozen in place so they don't have anything to do about it. If not, you should kill them in this order: Buccaneer, Swashbuckler, Witchdoctor, Musketeer, Privateer. The buccaneer should come to you first due to charges, and the swashbuckler should come second due to movement range. The witchdoctor has the ability to take down a lot of your units with mojo storm, but it shouldn't be by your team until the other two have died. Musketeer isn't very much of a threat, but you don't want a distraction while taking down the Privateer. Last, while you can focus on one enemy and not have to worry about the others, take down the Privateer.
Note: You can attack other enemies while within the three square range of the Privateer. You just can't attack the Privateer itself while in the three square area.
 |
| Credit for this picture goes to Loveable Lawrence Voss |
9. The Marchioness
Note: By the title of this tip, you can obviously infer that this tip implies to privateers only.
The Marchioness is helpful on the final two floors: the Terror-Cottas and Moo Manchu. By now, most of you know that the Terror-Cottas have their specialty move: Vicious Charge. This can be fatal to your unit's accuracy and render them almost useless. This is when The Marchioness comes into play. Not only can she tank the hits, but she has a little trick up her sleeve that will solve all of the problems on those floors. One of her powers is Dispel Magic. It lowers all debuffs in the area, a.k.a. the accuracy lost from the vicious charges. With Dispel Magic in play, your units will be perfectly healthy to hit again.
Note: This problem can also be solved by obtaining Technomage's Glasses from Bishop.

10. Doubloons
Doubloons are extremely useful, especially on the Nefarious Five and Moo Manchu fights. Remember to always confirm your doubloon choice with your other teammate's moves.
Spell power doubloons are one of the best doubloons for speed runs, as they can boost a Witchdoctor's mojo blast up to about 1,500 per enemy (refer back to tip #3 for usage of moves) and it can get each flame from Captain Blood's Jacket up to around 2,100. This makes 2-3 attacks, some from the same move, kill a Nefarious 5 member instead of about 5-6 attacks!
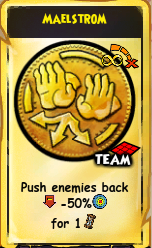
Also, Galewind/Maelstrom/Hurricane, glacier and volcano doubloons can help keep back or provide some extra traps for the enemies. This'll provide some extra time for you to kill closer enemies while they walk into other traps and damage themselves. The Galewind, Maelstrom, and Hurricane doubloons can even push the mobs back into previously laid traps! You can never get enough of those!
On the Moo Manchu fight, he will use a spell called Ice Wave. This will stop you in your tracks leaving you unable to move. This is a perfect opportunity to use retreat doubloons. Since many of your units won't have action in that round, it's an easy heal, plus you can get rid of a rarely used doubloon.
Minion doubloons can be used as distractions for the Nefarious Privateer's charming gaze. You can also use them on the Moo Manchu fight once all of the Moo Minions are dead. When you send them out, they can sometimes spawn across the statues that damage you, and they can damage Moo Manchu for you instead of continually having to send your companions across, damaging Manchu, then having him use his Nefarious Defense cheat on you and teleporting you back to the other side to go across and lose more health from the statues.

11. Speed Chests
There are some multiplayer chests on floors four and eight. However, only one on each floor doesn't disappear after a set amount of time. There is one four-player "speed chest" on each of the floors, and there are two two-player "speed chests" on each floor. The four-player doubloon chest should be located on the left side once you go up the stairs to go to the next floor. This chest's appearance depends on the total amount of time you've spent in the dungeon. The chest on floor four disappears after around 40 minutes, while the chest on floor eight disappears after around an hour and a half. The two-player chests are a little harder to find. There should be a staircase up to a second level overlooking the fourth and eighth floors. You can access it on the left side of the floors or the right side before you pass the screens to the next floor. These chests' appearances depend on your time spent on that specific fight on the floor they're on. I believe that on the fourth floor, the fires can't get past a four by four formation for you to get the two-player chests, and I am unaware how short your Nefarious 5 fight has to be to obtain the two-player chests.


12. KI Free Games
Have no crowns? Wanting to get a second chance to get rare items without having to run the tower again? Can I stop sounding like an advertisement? KI Free Games has trivia that you can do. For each set of trivia, you can get ten crowns for getting a 75% or higher, which is 9 out of 12 questions correct. You can take up to ten quizzes per day, giving you a total of one hundred crowns per day. You can use these crowns for one chance at each of the second chance chests: Nefarious 5 and Moo Manchu. You can either do these quizzes before your run, during your run (if you can handle it and multi-task), or staying after a run. You can reach the quizzes at the following address: https://www.freekigames.com/trivia. If you're on the homepage, you can reach the trivia page by the shortcuts in the picture below.

So that's twelve tips to make your Moo Manchu run be as quick, smooth, and rewarding as possible. With these tips, the tower won't be as nefarious as it previously was, and you'll breeze through it without any stress! If you have any questions or comments, please post them in the comments section below. Until next time, fair sailing, Pirates!
~Fishy Kyle
~Fishy Kyle
No comments:
Post a Comment
Please remember to be nice and to treat each other with respect! The Golden Rule still applies, even here!